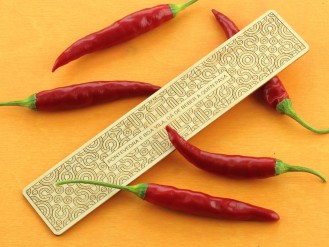
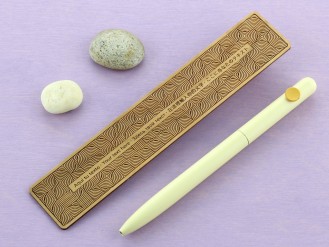
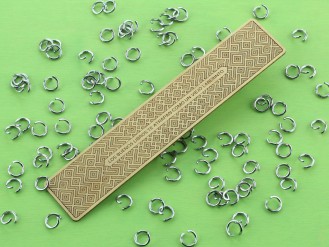
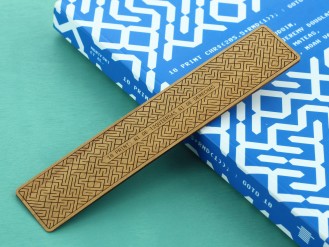
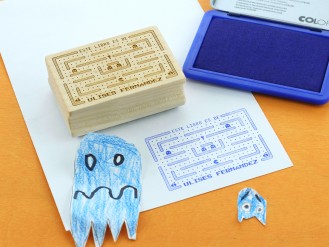
L ZERO 1966 bookmark


Style, elegance, and simplicity.
Pattern based on the series of plotter drawings on paper "Walk Through Raster" by Frieder Nake, a pioneer of digital art, created in 1966.
Have fun creating your own in the designer and add a custom text.
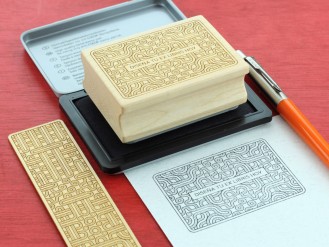
PATTERNAL DESIGNER
- Select the GLOBAL area and click RECREATE ALL to regenerate the pattern with the current zones and settings.
- Select a zone color and click RECREATE ZONE to regenerate the pattern for the selected zone.
- With a zone selected, CLICK on the symmetry icons to change them.
Make your own adjustments!
- Select a zone color, then the brush, and paint over the design. Adjust the symmetries, glyphs, and ratio for each zone.
- Try copying, pasting, and mirroring zones.
PATTERNAL
by Adam Jagosz and Alberto Fernández
| Width | 165 mm |
| Height | 32 mm |
| Thickness | 1,3 mm ± 0,15 mm |
| Weight | 11 gr |
| Material | Natural wood |
| Finish | Varnished on both sides |
PATTERNAL
PATTERNS DESIGNER
Idea and design: Alberto Fernández
Code: Adam Jagosz
USER GUIDE
Introduction
In this guide you will learn through brief descriptions and explanatory videos of a few seconds how to generate the pattern that we will engrave on your favorite bookmark.
You'll quickly find the designer very easy to use, and you'll have a great time exploring and being amazed by the endless possibilities it offers for creating unique and visually appealing patterns.
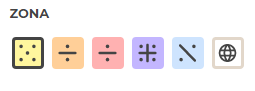
ZONES
To create patterns of different complexity, the designer allows you to create up to 5 zones of arbitrary size, being able to apply different properties and transformations to each of them to modify the final result.
Creating zones
Zones are represented by colored tiles in the ZONES palette:
 To create a zone:
- Select a color from the ZONE palette.
- Select the brush tool.
- Paint an area of the selected color within the design to create a zone.
Please note that there can only be one zone for each color, but copies can be created (see cloning zones).
When you paint over an area again, the previously painted area will be erased. Any other areas you have painted over will also be erased, although their content will be preserved.
The global zone
The blank or uncolored area of the design is automatically assigned to this special zone, represented by a globe icon in the ZONE palette.
You are allowed to assign symmetries to this area but you will not be able to perform any transformations on it, except to retouch cells with the magic wand.
However, this area has the particularity of allowing you to regenerate the content of all areas simultaneously when it is selected. You will use it a lot.
SYMMETRIES
Symmetries allow you to specify how the pattern of an area is generated, creating content in an orderly or completely random manner.
Each tile in the ZONE palette displays an icon of the symmetry assigned to it:

The different types of symmetry that can be assigned to each zone are found in the SYMMETRY palette:
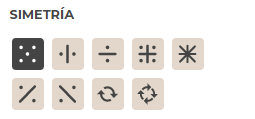 Types of symmetry
Symmetry types are represented by tiles with different icons that allow you to recognize their type:
- Random
- Horizontal
- Vertical
- Horizontal and vertical
There are other types of symmetry that are exclusive to square areas:
- Octal
- Diagonal to the right
- Diagonal to the left
- 1st order rotational
- 2nd order rotational
Assignment of symmetries
To assign a symmetry to an area:
- Select an area from the AREA palette.
- Select an available symmetry type from the SYMMETRY palette.
Explore different results by repeatedly clicking on a symmetry type. Each click generates a new pattern that assigns different glyphs to each cell in the active area while maintaining the symmetry type.
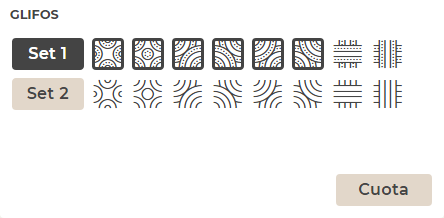
GLYPHS
Patterns are made up of different elements or square blocks with graphic designs that connect to each other. Each of these blocks or elements is a glyph, since we use fonts to represent them on screen.
To create more specific patterns, the designer allows you to define a specific set of glyphs for each area, activating or deactivating them arbitrarily in the GLYPHS palette.
Glyphs selection
To define a set of glyphs for a zone:
- Select a zone from the ZONE palette.
- In the GLYPHS palette, turn glyphs for the selected zone on or off by clicking on them.
Glyphs sets
Some patterns may have multiple glyph styles, called SETS.
Each set has a numbered button that when pressed alternates the glyphs of the design while maintaining the similarity.
For example, the Disco Pop pattern has 4 different sets, in which the number of lines of the glyphs varies:
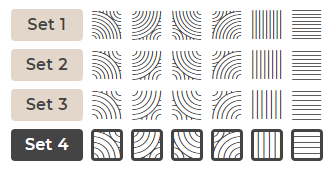
In some more complex models like Ionia it is possible to assign glyphs from different SETS to each zone, activating several of them at once.
Glyph quota
To make even more precise adjustments to the pattern, it is possible to modify the probability of appearance of each glyph in the QUOTA panel of the GLYPHS palette.
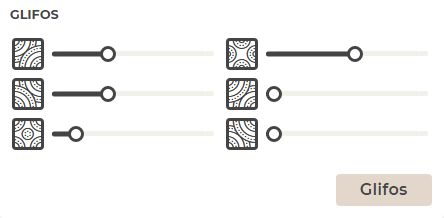
To adjust the glyph quota:
- Select a zone from the ZONE palette.
- In the GLYPHS palette, tap QUOTA to access the quotas panel.
- Adjust the quota of each glyph using the sliders.
OPERATIONS WITH ZONES
Modifications and transformations can be made to the created areas, such as:
- Copy and paste (clone areas)
- Paint (reassign areas)
- Retouch individual cells
- Retouch related cells
- Recreate
- Rotate
- Flip horizontally
- Flip vertically
These actions are performed using the different icons in the toolbar located above the design.
![]()
Cloning zones
The copy and paste tools create clones of the selected area to create repeating sub-patterns in different areas of the design. When you modify a cloned area, all its copies or clones are modified as well.
To clone a zone:
- Select the copy tool from the toolbar.
- Click on an area to copy it.
- Move to a point in the design where you want to paste the copy of the area.
- Click to paste the area.
Zone painting
With the paint can tool we assign another color to an existing area. This operation can be useful if we want to modify a cloned area to create a variation of the original.
Recreate
Regenerates the content of the selected area, creating random variations of the pattern according to the glyph selection and the symmetry of the area.
Select the GLOBAL zone to regenerate all zones at the same time.
Rotate and flip
Two very useful actions to transform areas in order to create symmetries in the design.
Rotate
Rotates a square area in 90 degree increments.
Flip horizontally
Flips an area on its horizontal axis.
Flip vertically
Flips an area on its vertical axis.
Retouch individual cells
It is possible to retouch individual cells using the magic wand tool with 1 star.
Select the wand and click on a cell in the layout to change its glyph cyclically.
If the affected area has clones, the changes occur in all its copies.
Edit related cells
Symmetrically related cells can be retouched using the magic wand tool with 3 stars.
Select the wand and click on a cell in the layout to change its glyph cyclically and simultaneously in all related cells.
If the affected area has clones, the changes occur in all its copies.
THE DESIGN
The design panel shows a simulation of the final pattern that will be engraved on the product when you complete your purchase.
Visibility of zones
View the design without distractions by hiding the colored areas by clicking the EYE icon. Click again to show the colored areas.
Grid
The grid shows or hides the cell border of each glyph.
Undo and redo
The back and forward arrow icons allow you to undo actions to return to a previous point, or move forward to the last action.
Keep
Allows you to keep a copy of the current design.
Save as many different designs as you like to choose later which one you like best.
Load
Load the saved layout into the design panel.
Delete
Deletes the saved layout.
BUY
You've already found a satisfactory design, it's time to make the purchase!
Scroll to the top of the product page, select a type of wood, indicate the quantity and click the BUY button.
Very soon you will have your bookmark with the pattern you have designed!
Short production times
In our workshop we prepare orders for our products very quickly:
Orders placed in the physical store are usually delivered in 1 hour or less.
Orders placed online are prepared in hours, and if possible, are sent the same day.
Exceptions
Under certain circumstances, the production of orders may take a little longer:
- Orders for many units.
- Orders with many different types of items.
- High peaks of work due to high demand (days before the end of the school year, Christmas or special dates).
Do not hesitate to contact us if you have any questions about the delivery of your order.
Pick & pay in store
To make shopping easier for our neighbors, we have the option of pick and pay in the store. If you live in the city or in the surrounding areas and you often travel to Pontevedra, this is the most convenient way to buy in our store.
You will receive an email when your order is ready to be collected.
National Shipping (Spain)
If you cannot travel or simply live in another location and want to receive the order at your home or workplace, you can select the shipping method that best suits you according to the delivery time (24-48h or 72h) and make the payment with your credit card or Bizum.
The cost of peninsular shipments ranges between €5.50 and €7 depending on the distance and delivery time you select.
Shipments to the European Economic Community
The cost of international shipments varies according to destination, weight and size of the package, and is calculated in your shopping cart.
Notifications and tracking
You will receive an email when your order is ready to ship and a tracking link, depending on the shipping option selected.